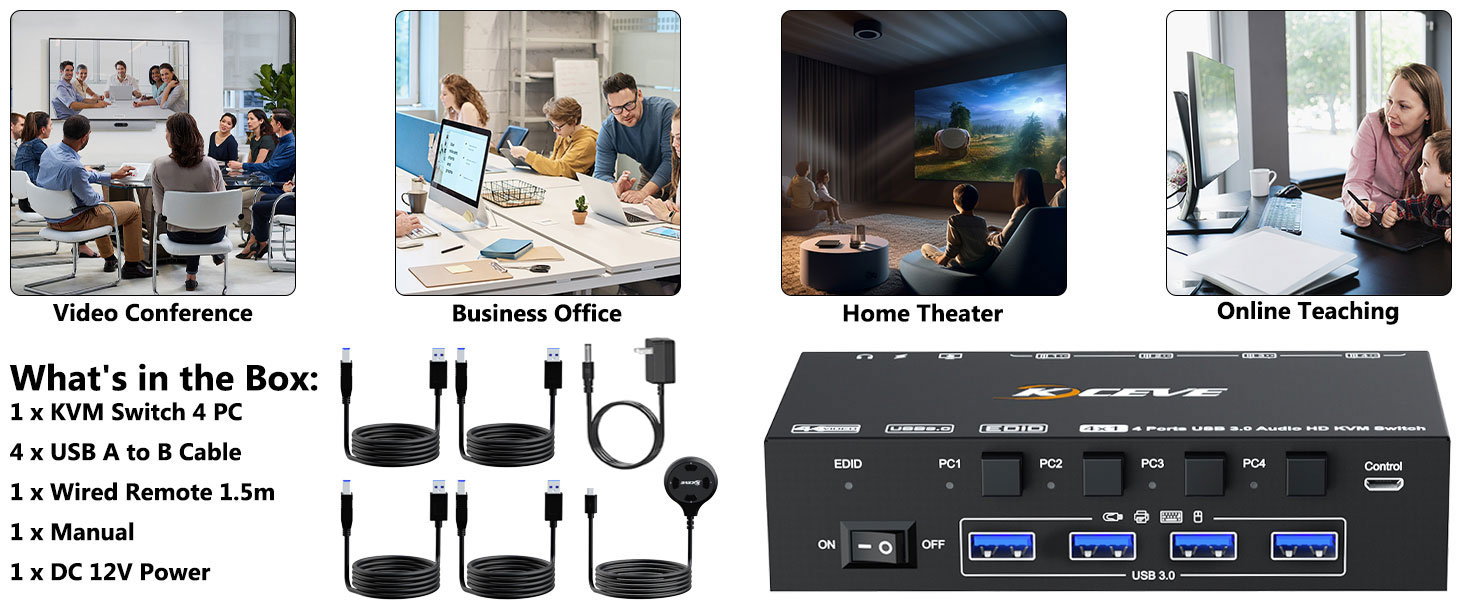


KVM Switch 4 Ports
The KVM Switch HDMI 4 Ports allows you to switch between 4 desktops/laptops. Use 1 set of keyboard and mouse to control 4 computers and 1 monitor without having to buy additional monitors, keyboards and mouse. KVM Switch 4 computer helps you tidy up your desk and improve office efficiency. HDMI KVM Switch 4 Ports is the first choice for offices and home work.

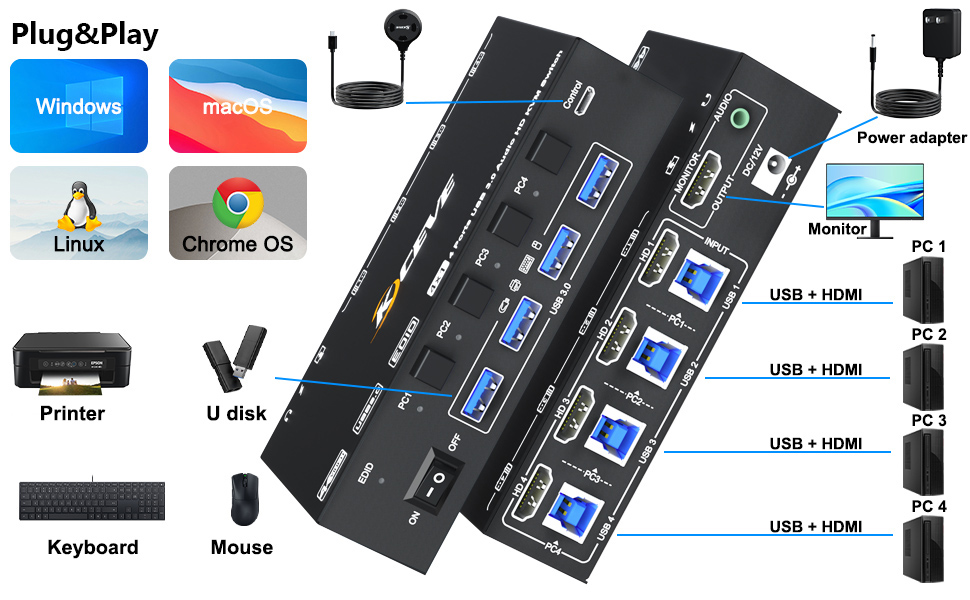
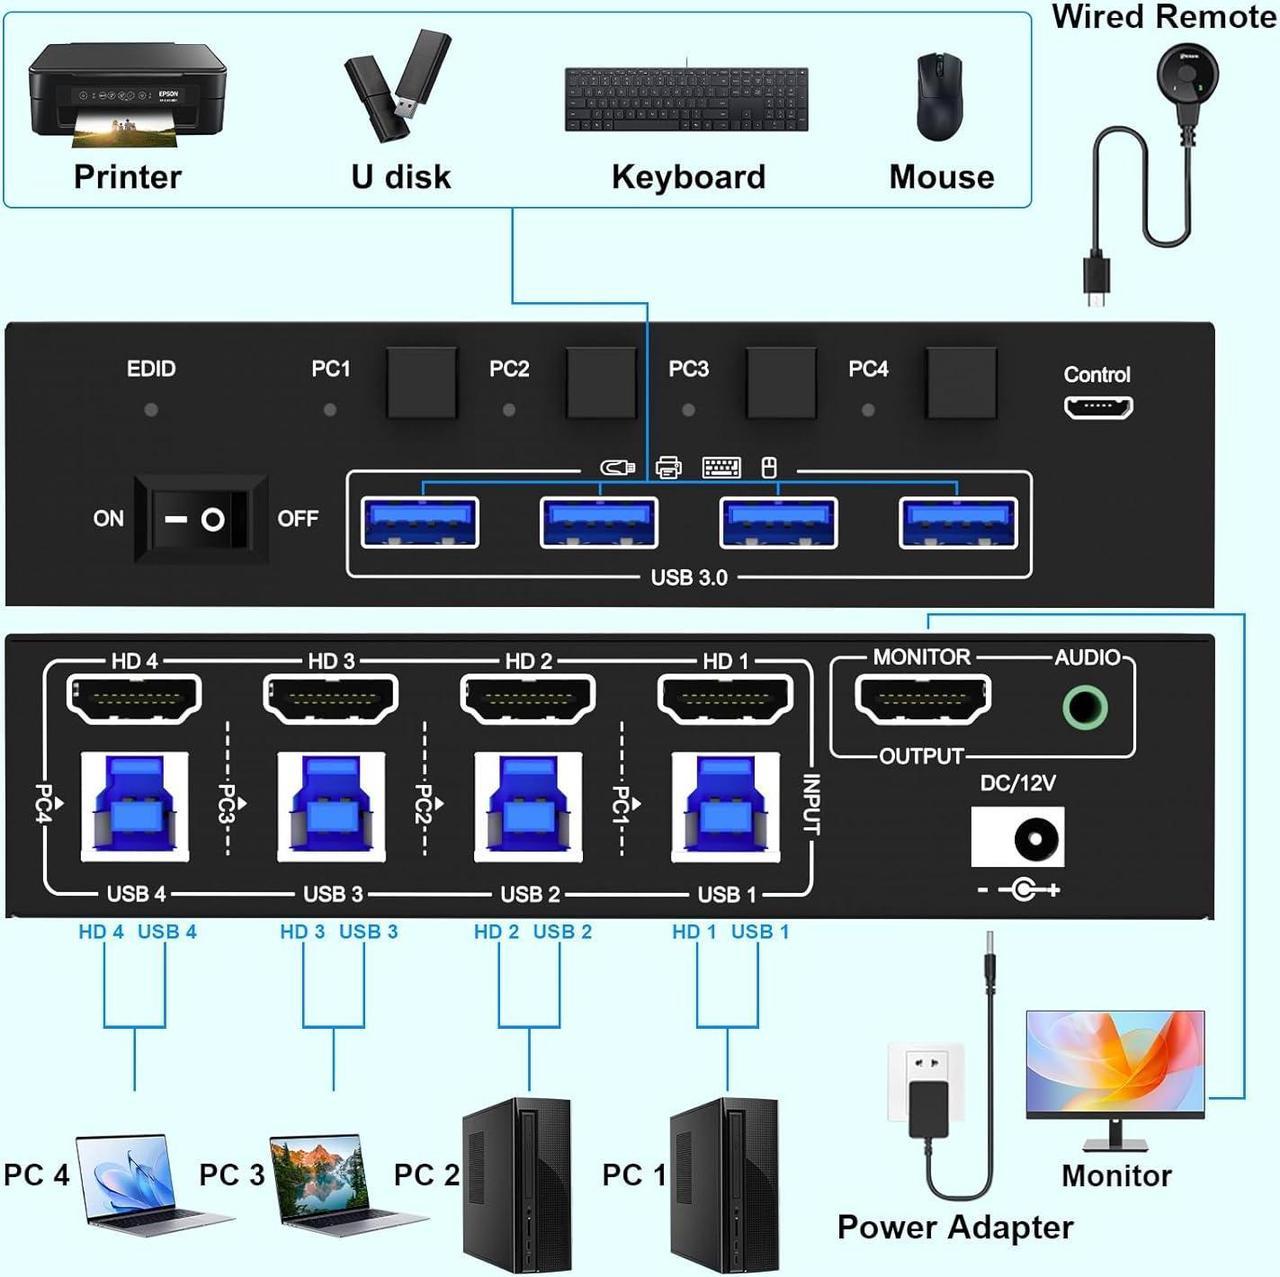
How to connect the KVM Switch:
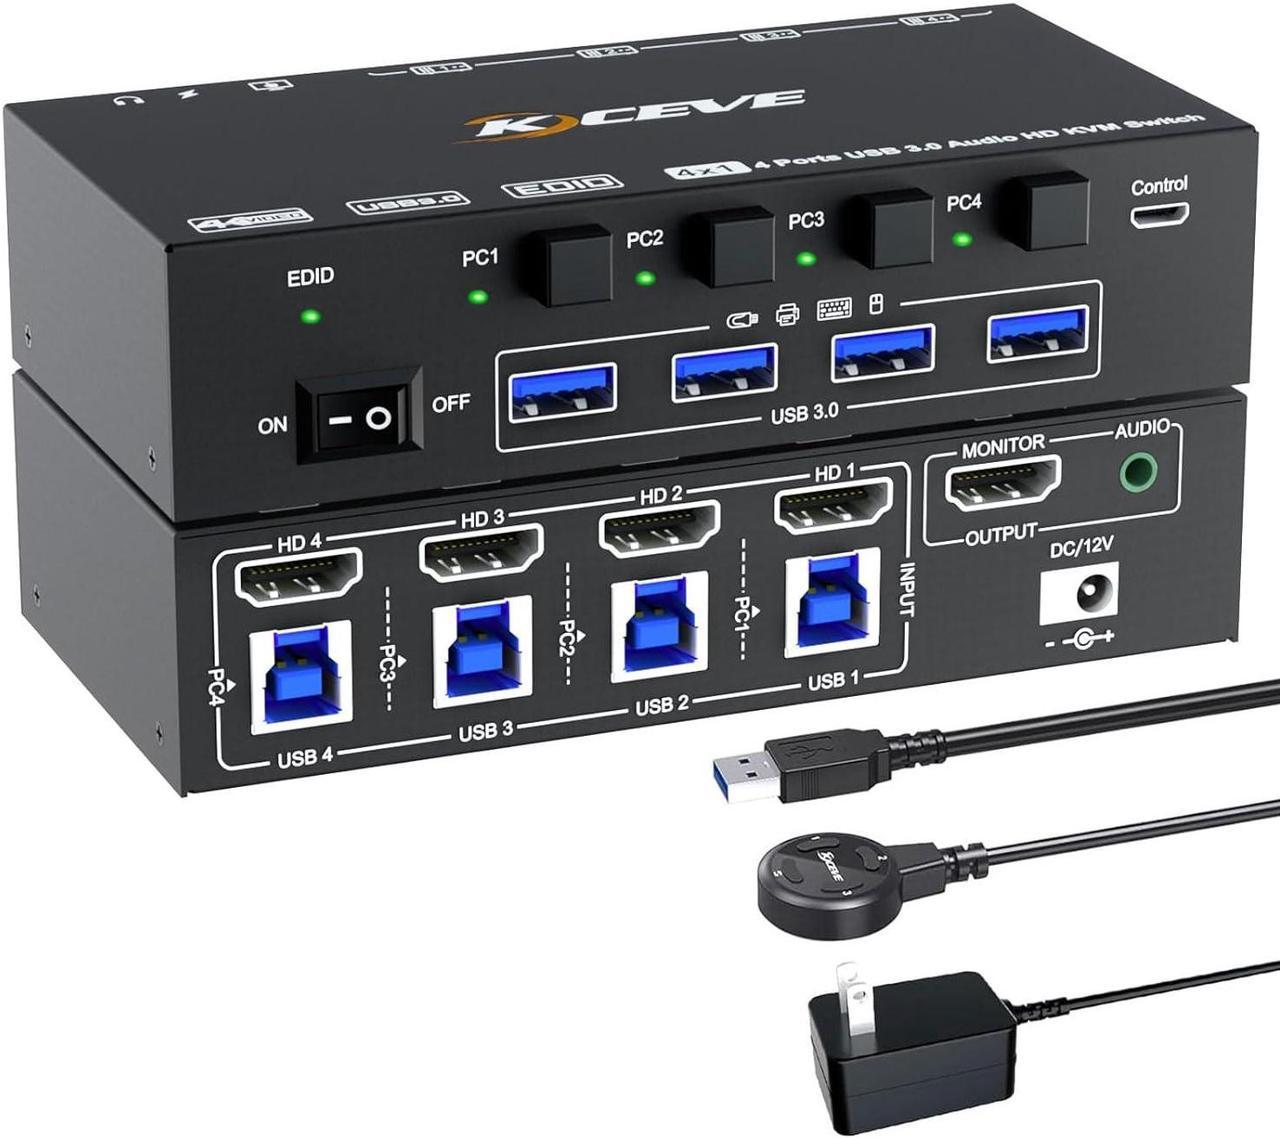
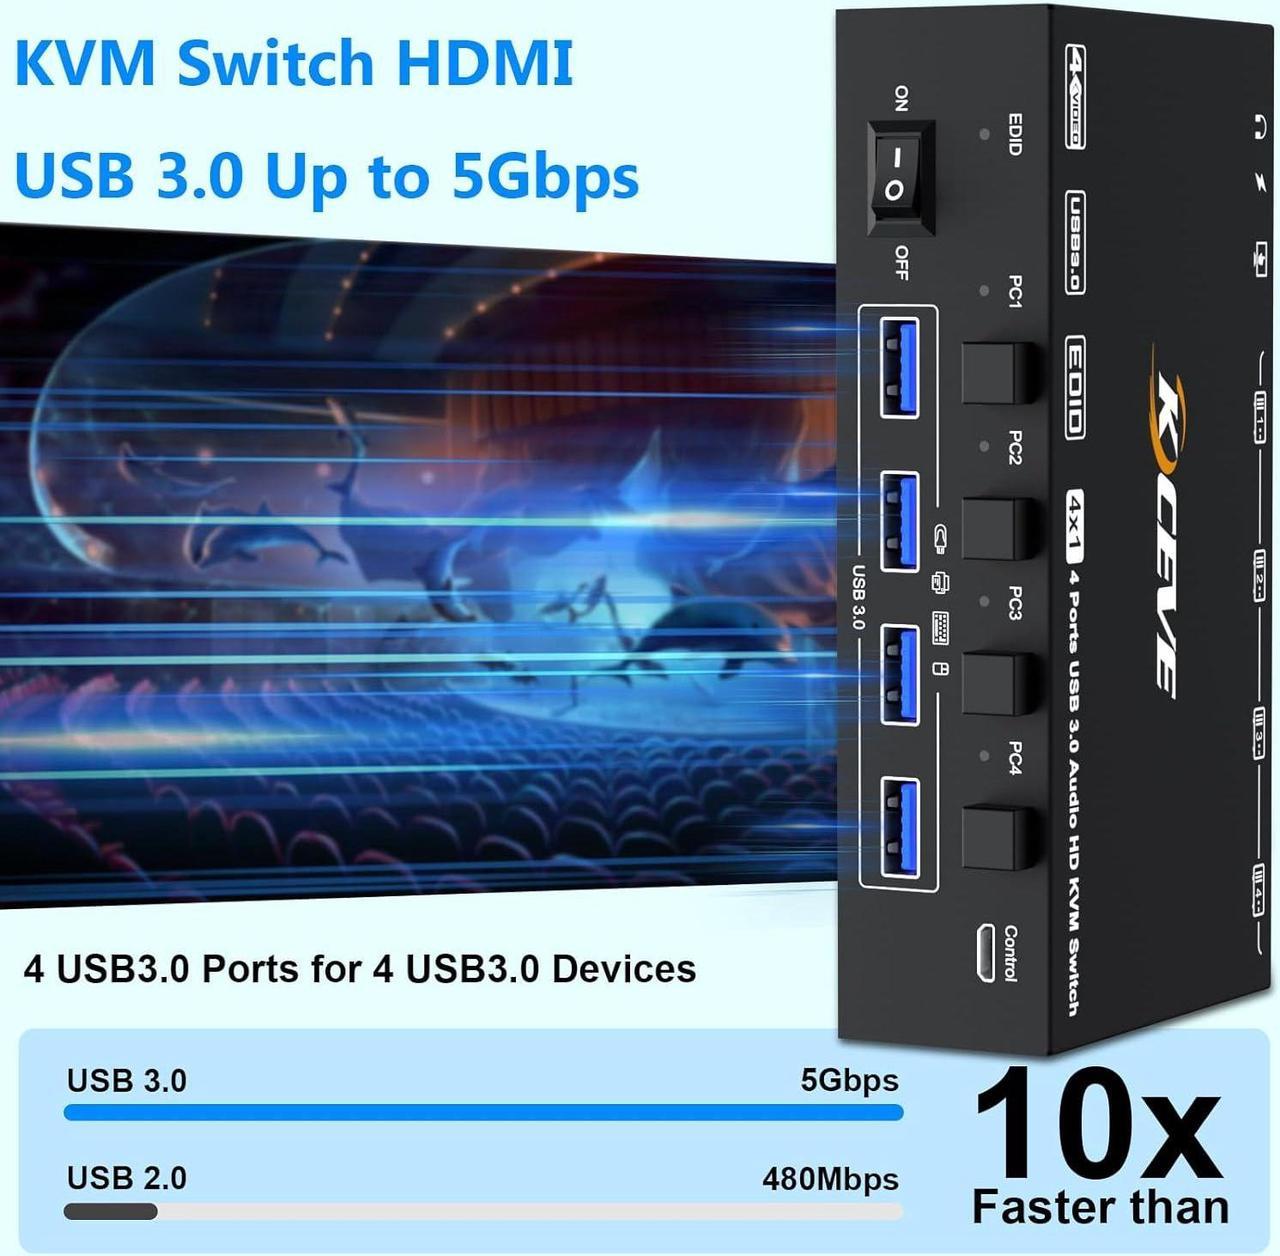
For input, each computer needs 1 HDMI + 1 USB 3.0 connection, for output needs 1 HDMI connection
- Step 1: Connect 1 HDMI cable + 1 USB cable to PC 1 and KVM switch (HD 1, USB 1).
- Step 2. Connect 1 HDMI cable + 1 USB cable to PC 2 and KVM switch (HD 2, USB 2).
- Step 3. Connect 1 HDMI cable + 1 USB cable to PC 3 and KVM switch (HD 3, USB 3).
- Step 4. Connect 1 HDMI cable + 1 USB cable to PC 4 and KVM switch (HD 4, USB 1).
- Step 5. Connect 1 HDMI cable to monitor ( output)
- Step 6: Connect your USB device (keyboard and mouse) to the USB 3.0 port on the KVM switch. You can connect up to 4 USB 3.0 devices at the same time.
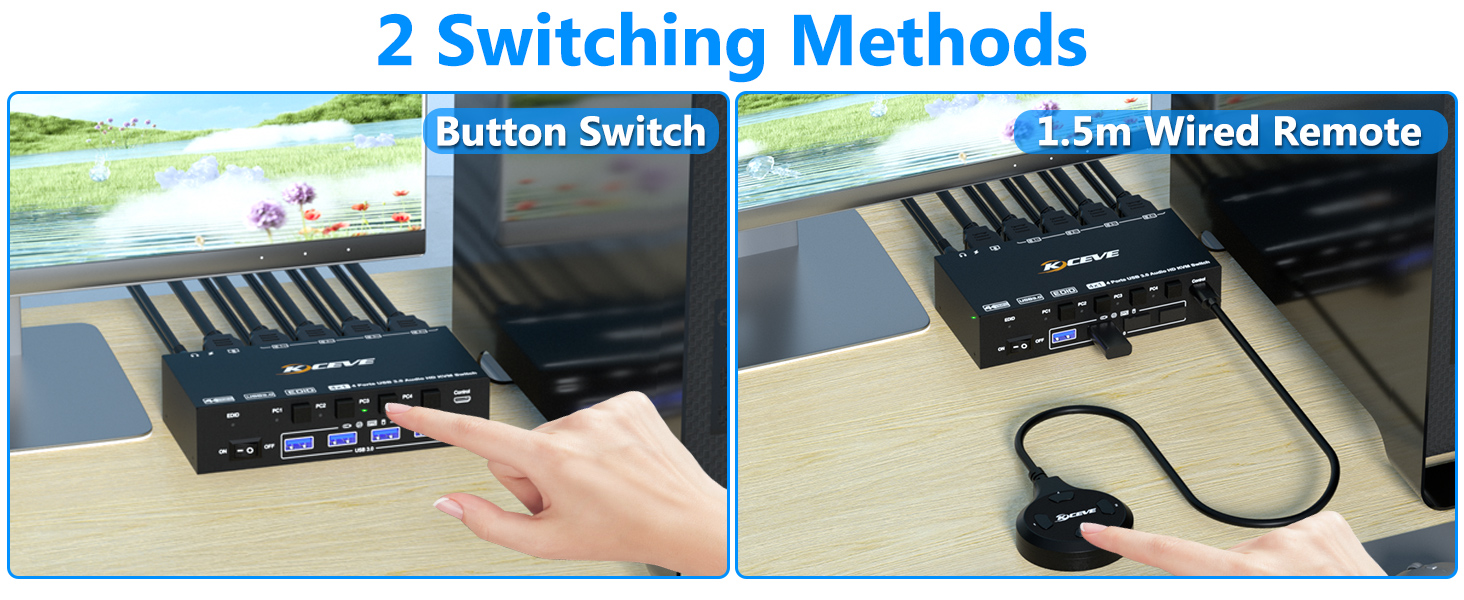
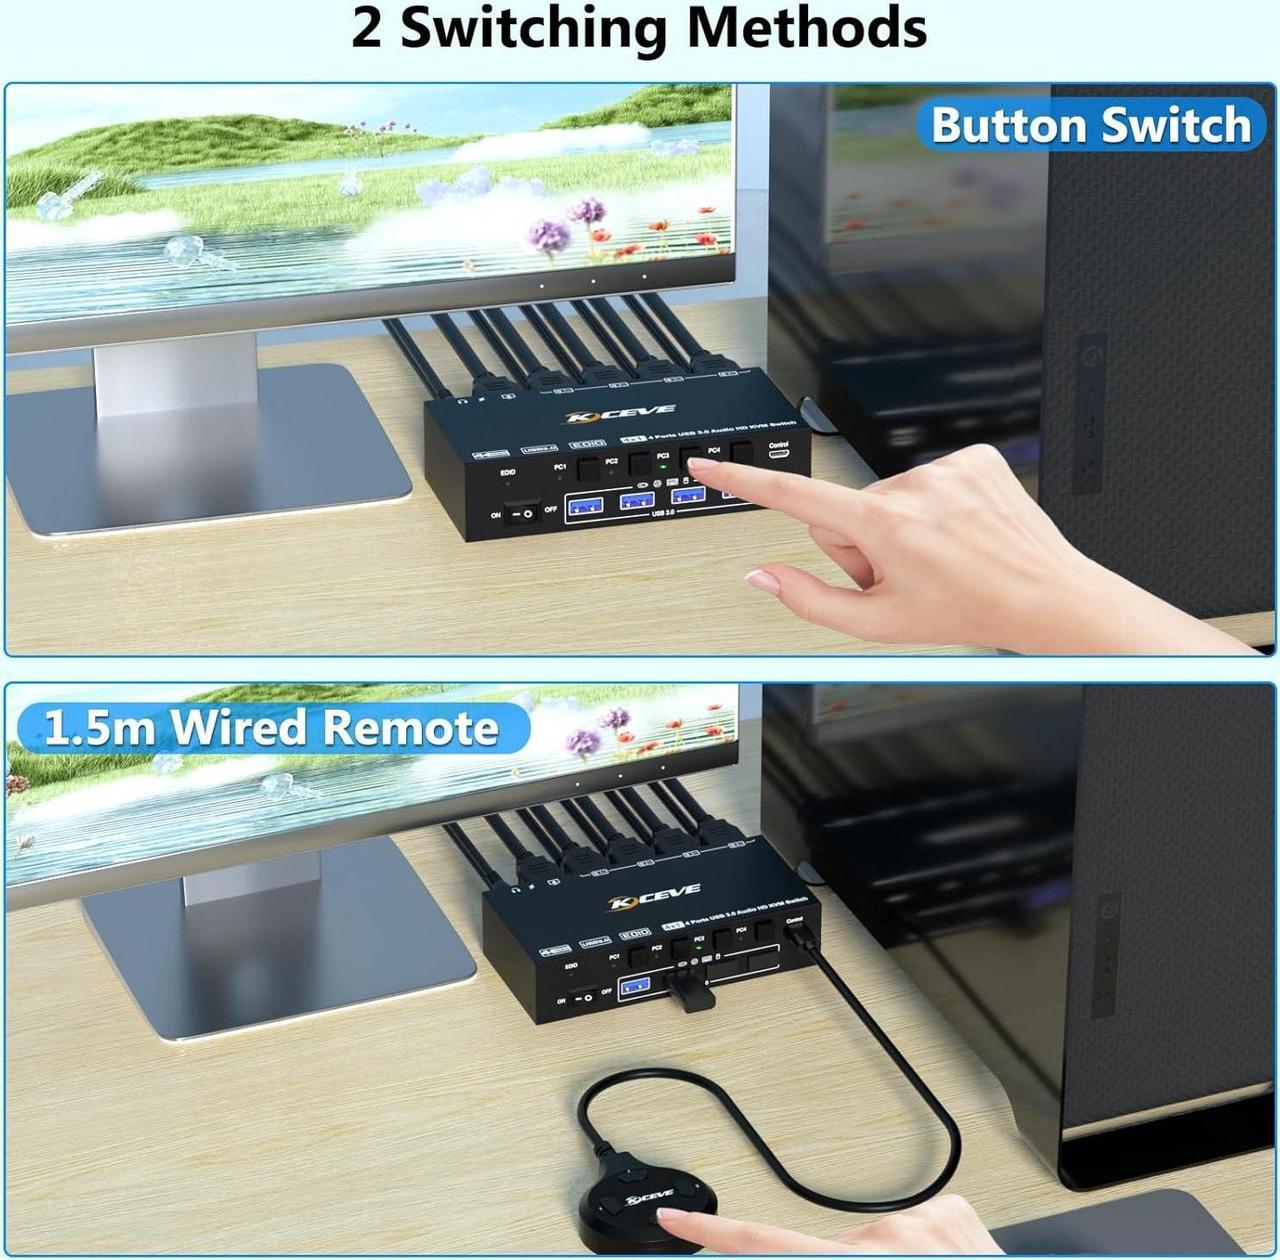
- Step 7. Connect the wired remote control
Note: Please connect the 12V DC power adapter to provide sufficient power. Using a shorter 8K HDMI can make the KVM switch more stable.