KVM Switches Dual Monitor Switch for 2 Computers 4K KVM Switch 2 Port KVM Display Port KVM USB KVM Switch 2 Computers Monitor Switch USB KVM Switch Computer Switch for 2 Computers
Installation Step;
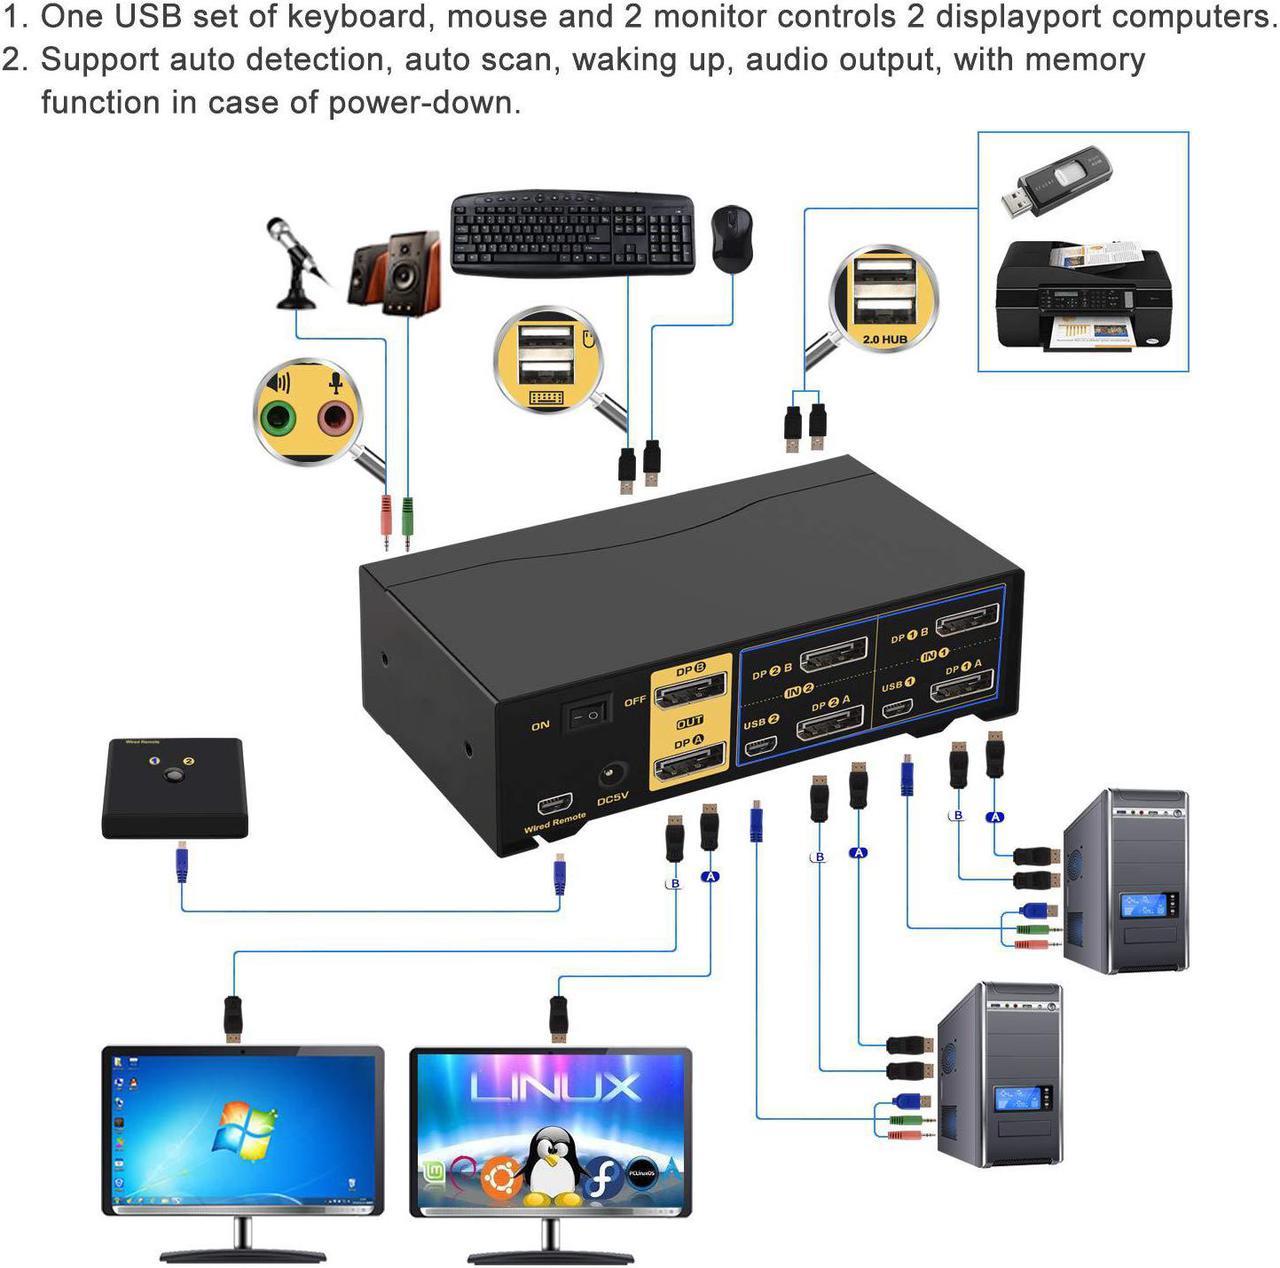
1. Turn off all your devices and unplug all cables.
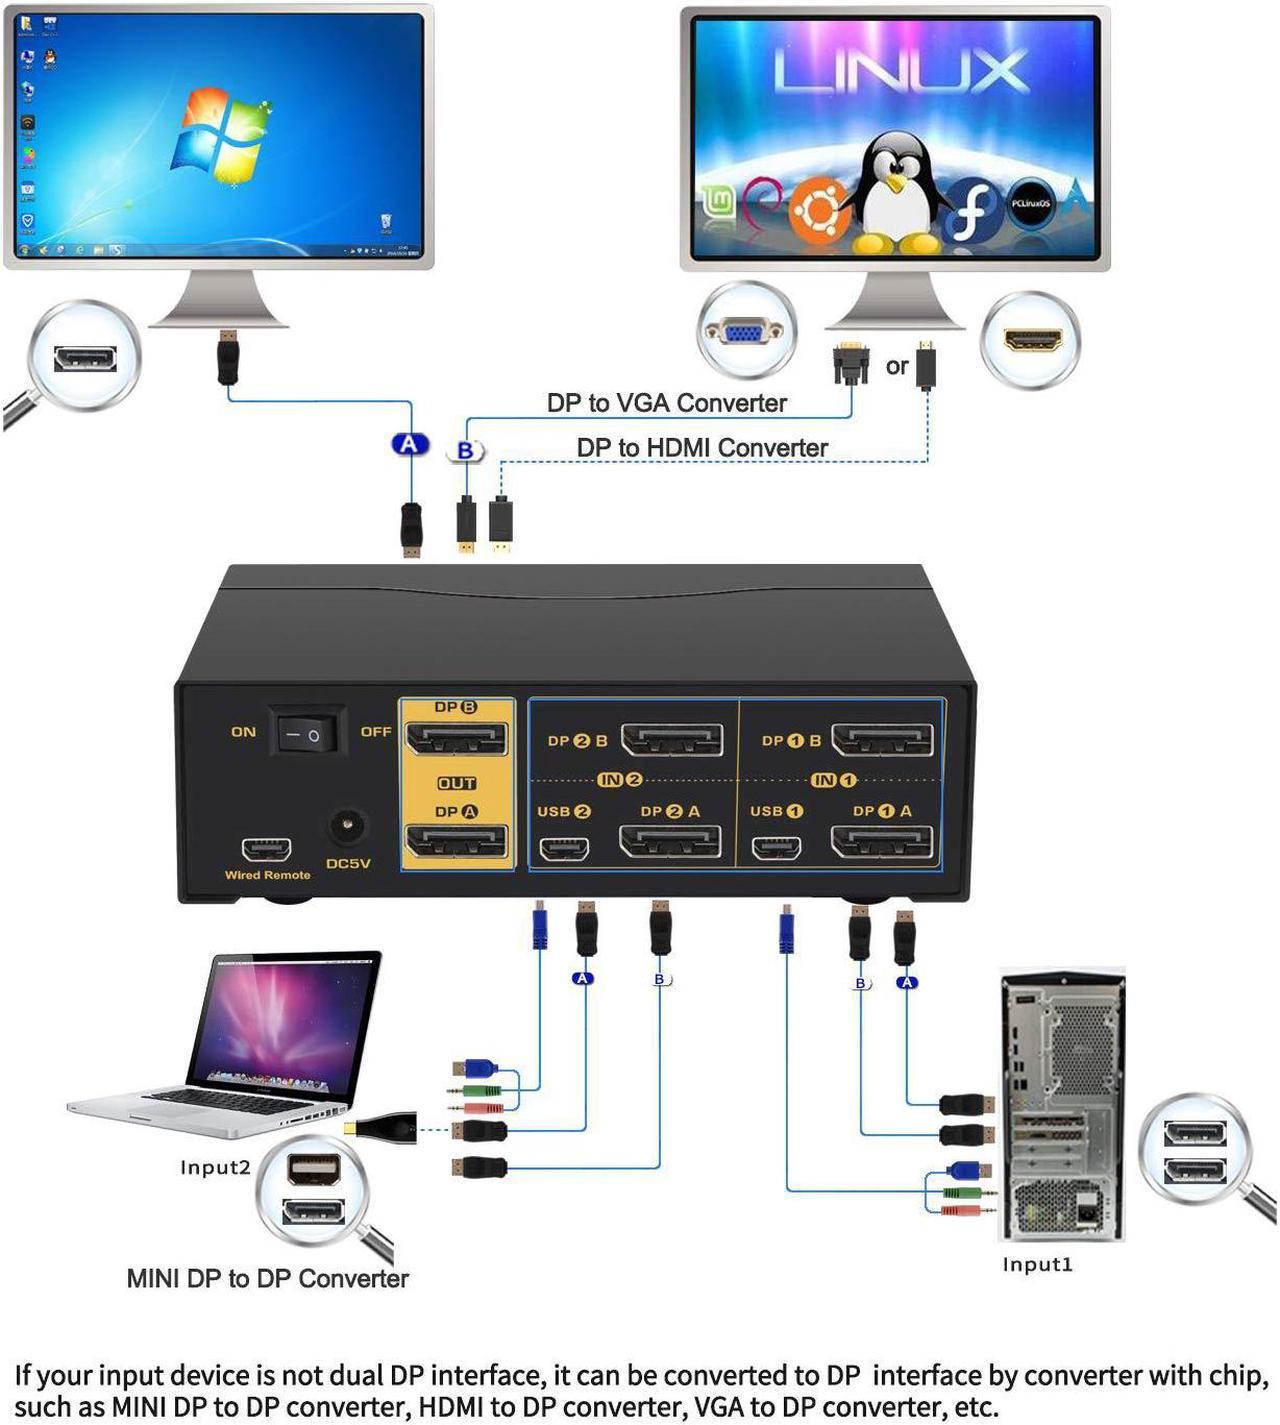
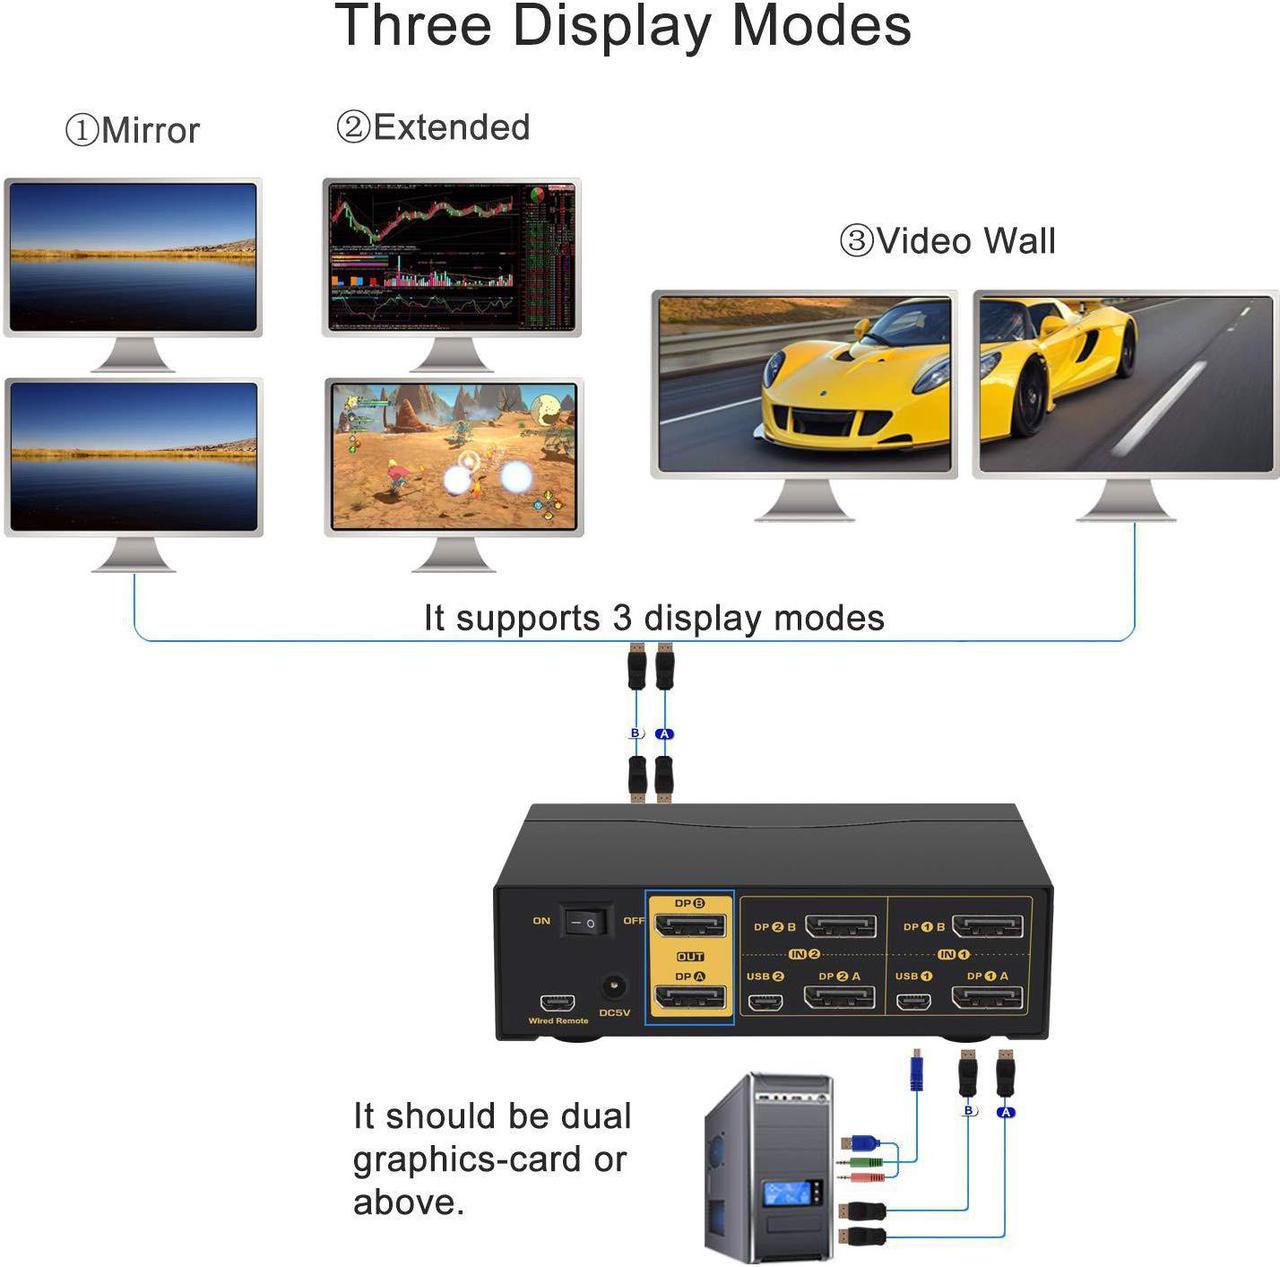
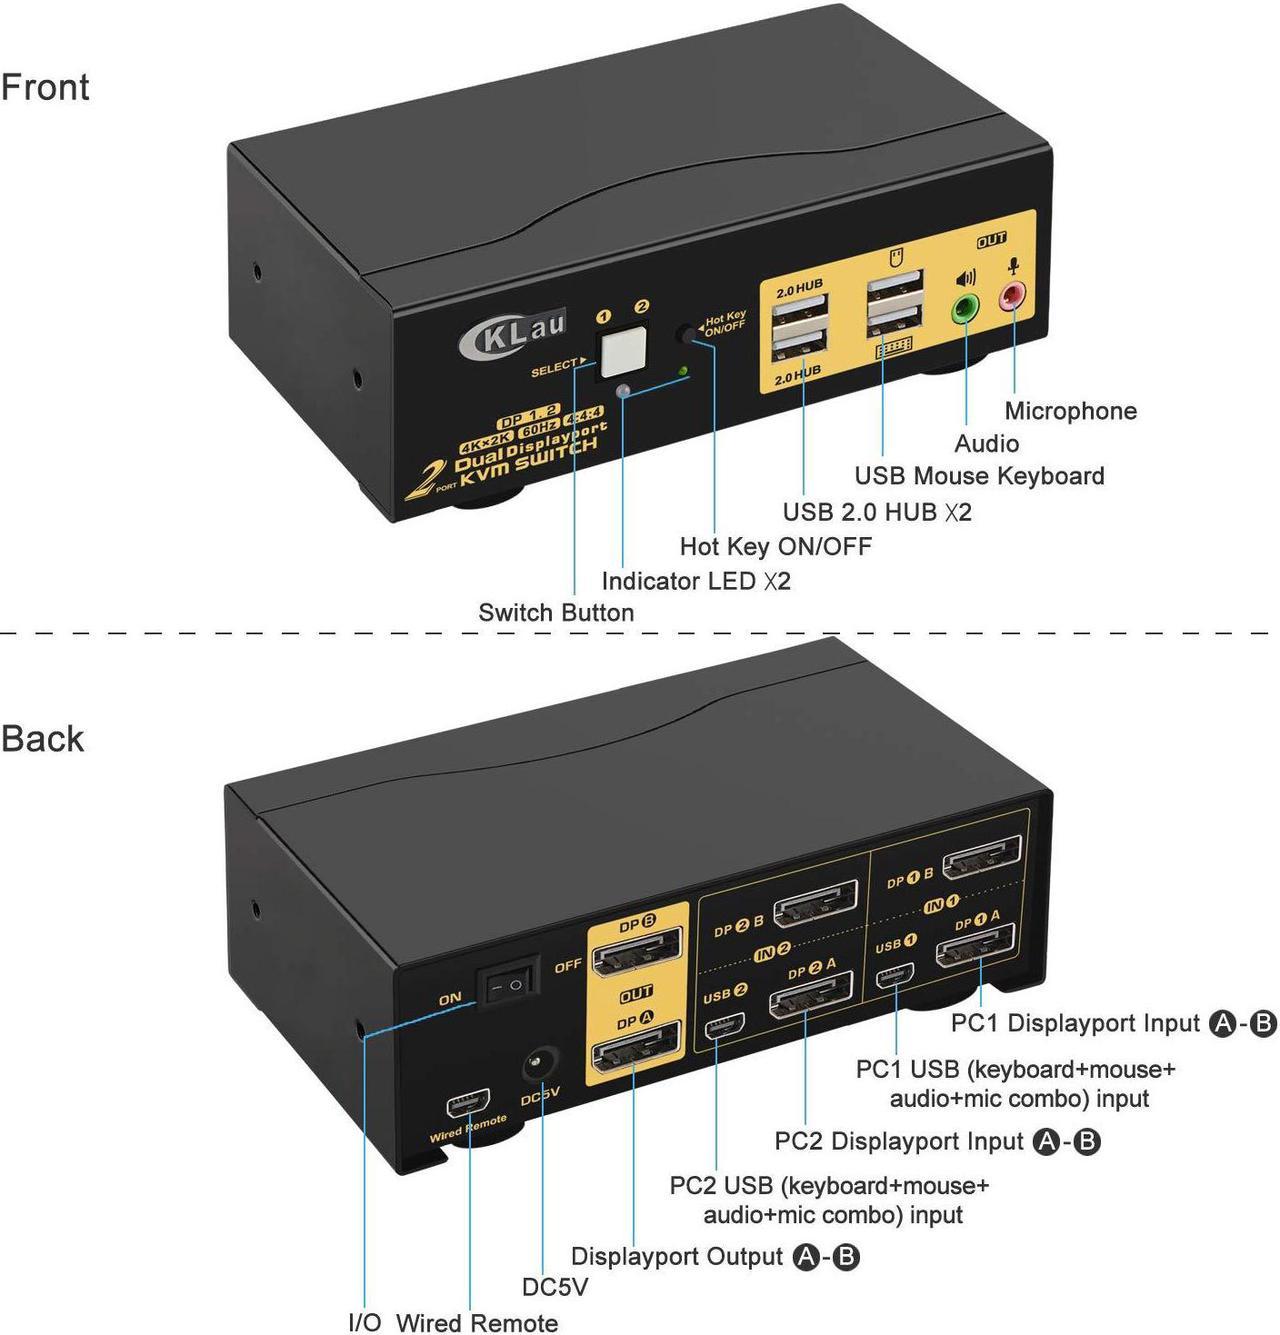
2. Plug the special USB cable and two Displayport cables into the KVM switch and your computers.
3. Plug the Displayport cables into the KVM switch and your monitors.
4. Plug mouse into mouse slot of KVM switch, plug the keyboard into keyboard slot of the KVM switch.
5. Plug your speaker/headset/other USB 2.0 device/wired remote push button into the KVM switch if needed.
6. Plug the DC5V 2A power adapter into the KVM switch and AC socket, then turn on the KVM switch.
7. Turn on your devices.
Package include:
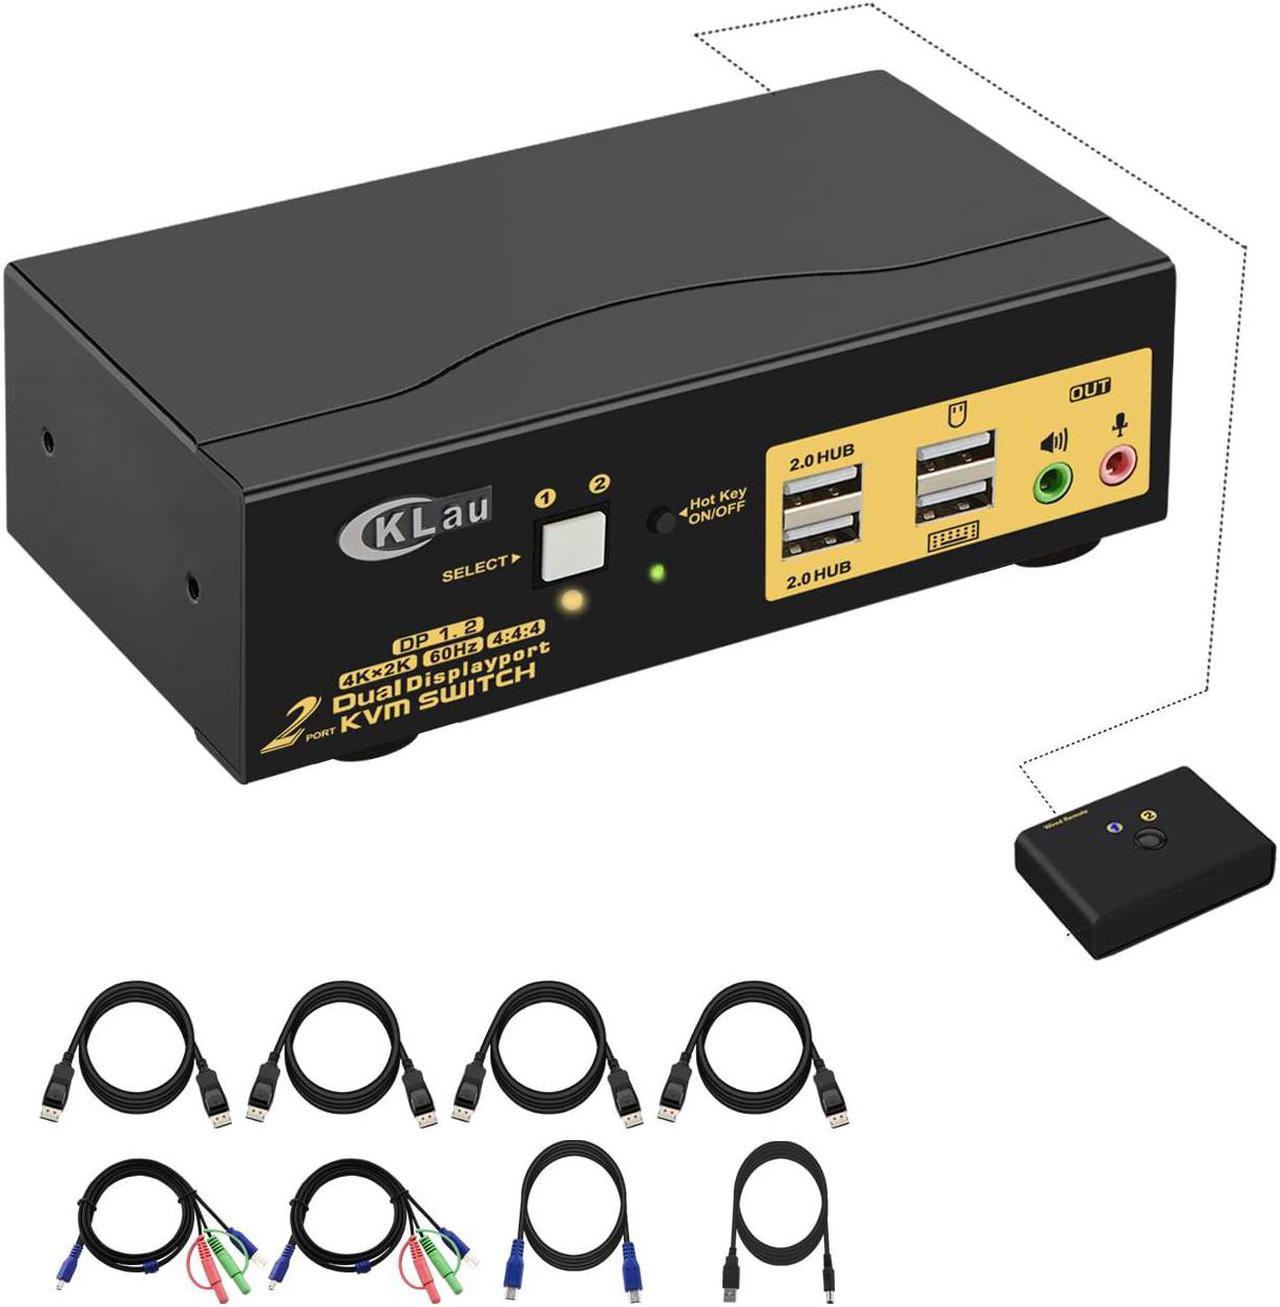
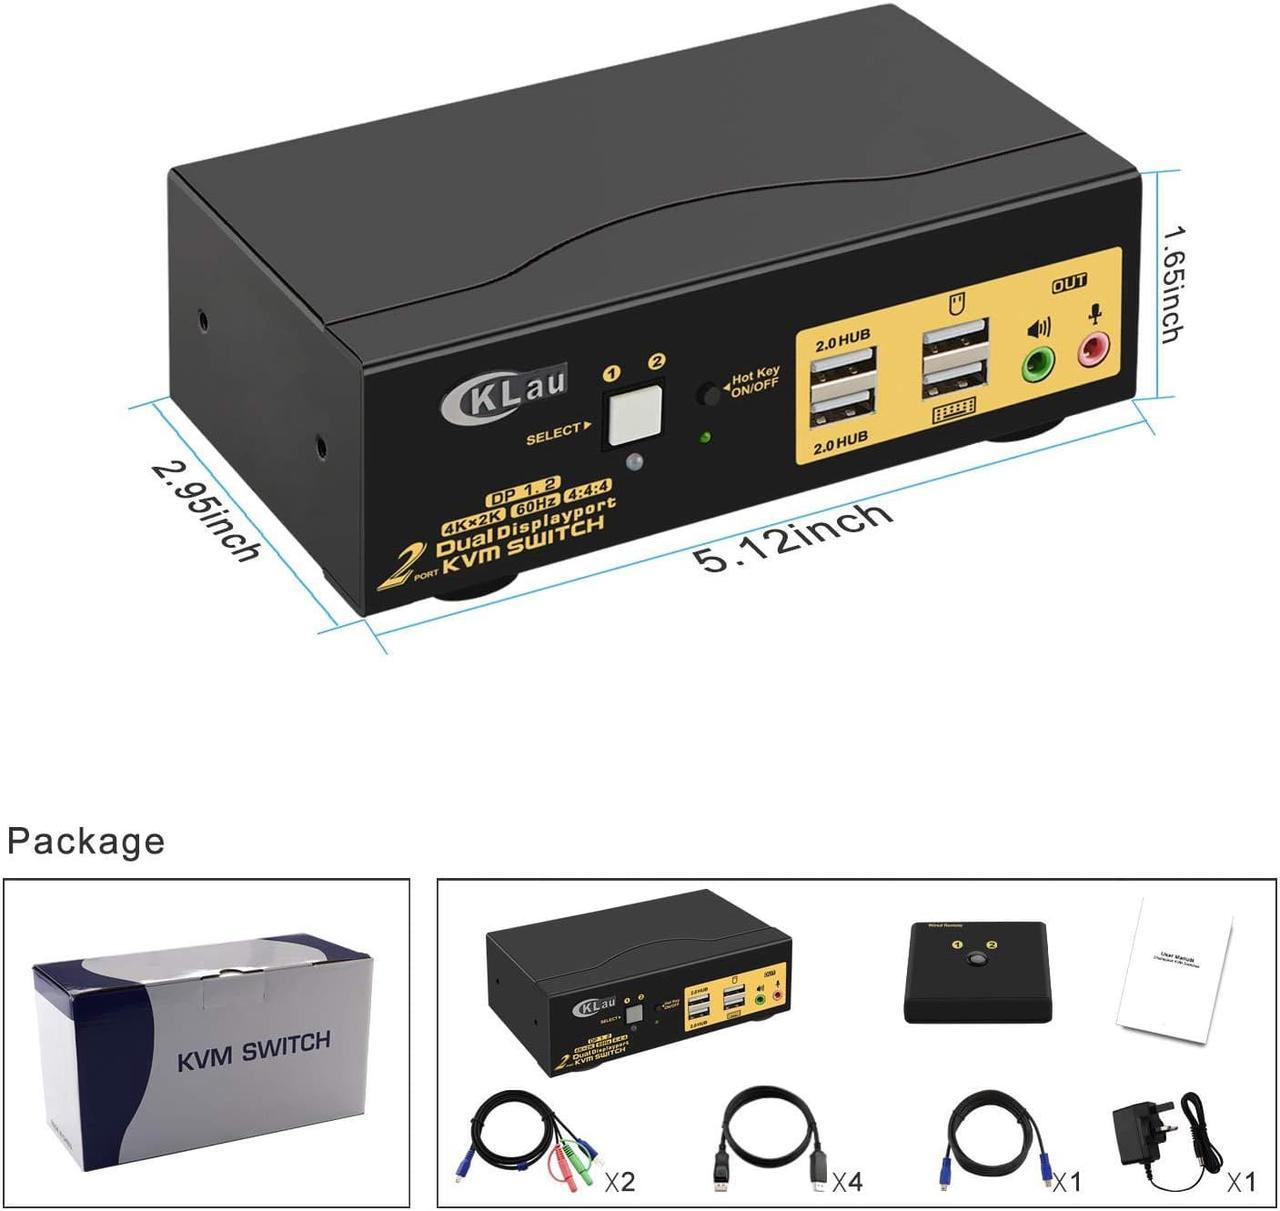
1pcs 2 port KVM switch
2pcs special USB cables
4pcs Displayport cables
1pcs DC 5V 2A Power adapter
1pcs English manual
1pcs wire remote push button switch
Tips:
1. The Displayport port supports DP 1.2 and is compatible with DP 1.4 devices at 4K@60Hz only. Please set up your devices to 4K@60Hz before connecting to the KVM Switch.
2. If your computers/laptops are without Displayport port, please purchase a reliable adapter with the chip.
3. USB port of special USB cables is for transfer USB signal, you should plug it into your computers. If you want to use a headset, you should plug the audio port of special USB cables into your computers.
4. If one of your computers operates on BIOS, start by turning on that computer, entering your password, logging into the system, and waiting for the display. Then, switch to the second computer and turn it on. If both computers are BIOS-based, follow this sequence: start by powering on the KVM, then switch on the first BIOS computer, enter your password, log into the system, switch the KVM to the second computer, and finally, turn on the second BIOS computer. In summary, avoid starting both BIOS computers simultaneously, as it may cause issues like a black screen or disable your keyboard and mouse.
